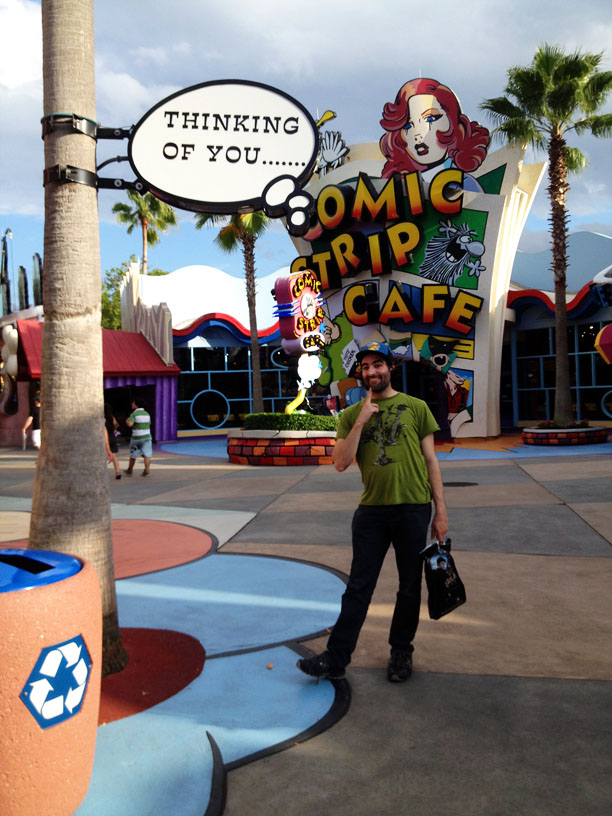
A while back, I participated in the Harry Potter gift exchange on reddit. I’d participated in a few other gift exchanges previously, and they were all pretty much bummers in that I’d put a lot of time and effort into picking out what I thought would be a great gift only to have the giftee not even bother to acknowledge that they’d received it. However, I felt strongly that the Harry Potter exchange would be different, more magical, both because of the subject matter and because this time I had a plan in place for what I wanted to give. Something I’d been thinking about making ever since my trip to the Islands of Adventure. Something that you couldn’t buy anywhere. No, not friendship. A picture frame that made it look like you were on the cover of the Daily Prophet. Just in case you’d like one, here’s how I made it!
What you’ll need:
- A digital photo frame that supports video files, with a total width of less than 8.5 inches. I used the Micca M707Z.
- An SD card. You won’t need a huge one unless you plan to cycle through a number of videos instead of just one.
- Basic video editing software
- Plywood, enough for an 8.5×11 sheet plus a few more inches for the other frame components
- paint or wood stain
- wood glue
- double sided tape or mod podge or your preferred adhesive
- x-acto knife
- basic woodcutting tools (I used a Rockwell multi-material cutting saw)
- photo editing software
- printer
- a few sheets of paper
All of your measurements will be based around the dimensions of your digital photo frame, so if you’ve ordered it online, you should wait until you have it in hand to get started. For example, the photo frame I bought advertises that it has a 7 inch wide screen, when in reality, it’s just over 6 inches. That makes a big difference! Once you have your screen measurements in hand, you can proceed.
I did the newspaper portion of the project first. I used photoshop, but you can use any photo editing software you have. I’m sure if you were tenacious enough, you could lay everything out in Word! Choose any number of the free Harry Potter-inspired fonts on fontspace, and plot out your “articles” in a manner that’s pleasing to you. They can be literally about anything you want: a wizard fashion show, a holiday, a special occasion, anything. It will look more like the movie newspaper if you mix fonts and include snippets of multiple stories rather than just one, but it’s really up to you. The only thing you need to work around is a rectangle of blank space exactly the size of your digital frame’s screen dimensions somewhere on the page. This rectangle also shouldn’t butt up to any of the edges: leave enough room for the frame part of your digital frame to hide so it’s not sticking out anywhere.
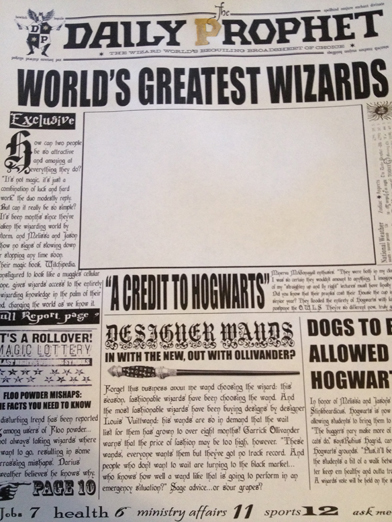
Print out a copy to make sure you’re happy with it. Cut out the blank area with an x-acto knife and use this printout as a template with which to trace onto your plywood. Once all of your lines are traced, you can start making your cuts. When you’re finished, you should have an 8.5×11 piece of wood with a hole the size of your screen cut into it. Now while you CAN do all of the woodcutting with a dremel, here’s why I don’t recommend it:
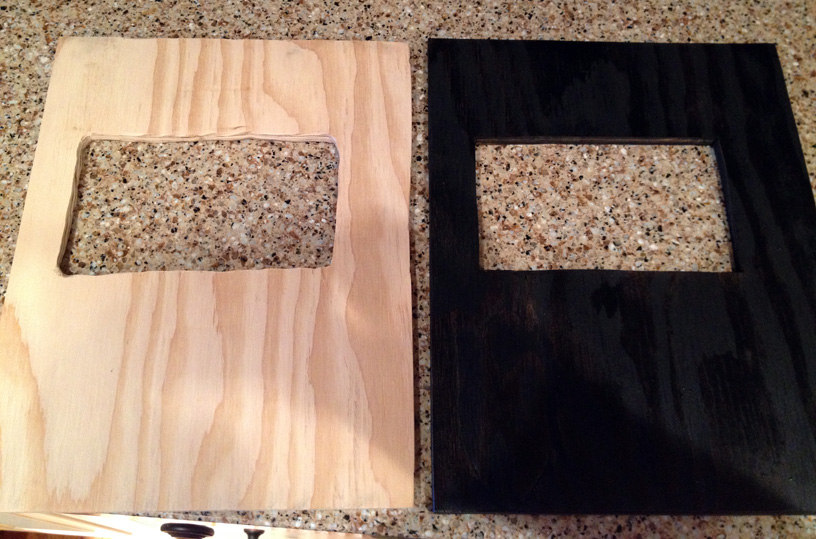
That one on the left? I used a Dremel and it took about a year to cut just to get it to that level of shittiness. Once I broke down and bought a proper tool, I cranked out the considerably less shitty one on the right in less than five minutes. You’re also less likely to be injured when using a tool in the way it’s intended instead of forcing a diamond bit through a sheet of plywood like I did. As with all power tools, use proper safety equipment, and read all instruction manuals before operating any tool you’re unfamiliar with!
At this point, you can paint or stain the back and sides, or you can wait until you have all of the wood components completed. It’s your choice! You don’t even have to do anything to the wood if you don’t want, but I feel like painting or staining it black allows the back and sides to recede so the focus is on the front, where it should be.
Now, you could just glue your digital photo frame to the back of this piece of wood and be almost done (and if you’d rather do that, you should definitely paint/stain first), but I wanted to make the photo frame removable for a couple of reasons: (1) so if it ever dies, it can be replaced and (2) if I decide I don’t want something Harry Potter related on display in my house anymore, I can always slide out the digital frame and use it by itself.
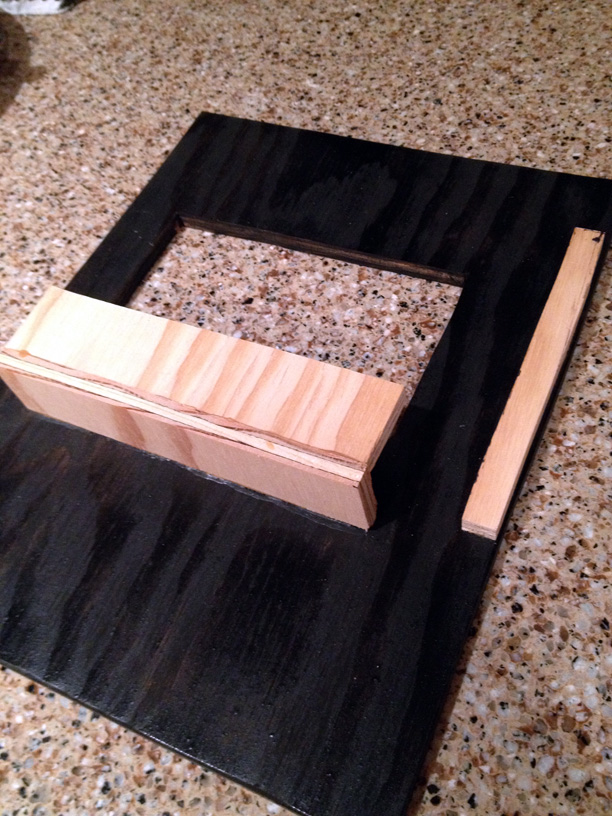
Here’s where my instructions get a bit dodgy if you’re using a different make/model of digital frame. My frame’s power cord and SD slots are all on one side–the left side, if you’re looking at the back. Thus, I wanted to keep that side open for easy access to the SD card. On the right side, however, I cut a small strip of wood (5.5″ long, .5″ wide) to serve as a stopper, so the digital frame has something to butt up against and keep it from sliding out of the side. I then measured the depth of the digital frame and cut two pieces of wood that would be glued together to give the digital frame a place to sit and would also hold it in place. My pieces were both 6″ long and 1.25″wide. At its deepest, my frame is just over an inch thick. My plywood was .25″ thick. By gluing the plywood together in an L shape, I was able to create a support that was just a hair over an inch think which enables me to seat the digital frame in snugly, which means it doesn’t need any support on the top of the frame to hold it in place. Depending on the depth of your frame, yours may be different. Use wood glue to glue the narrow strip of wood to the back side of your 8.5″x11″ piece of wood, on the opposite side of wherever your SD card inserts. Glue your two supporting pieces of wood into an L shape. Let dry.
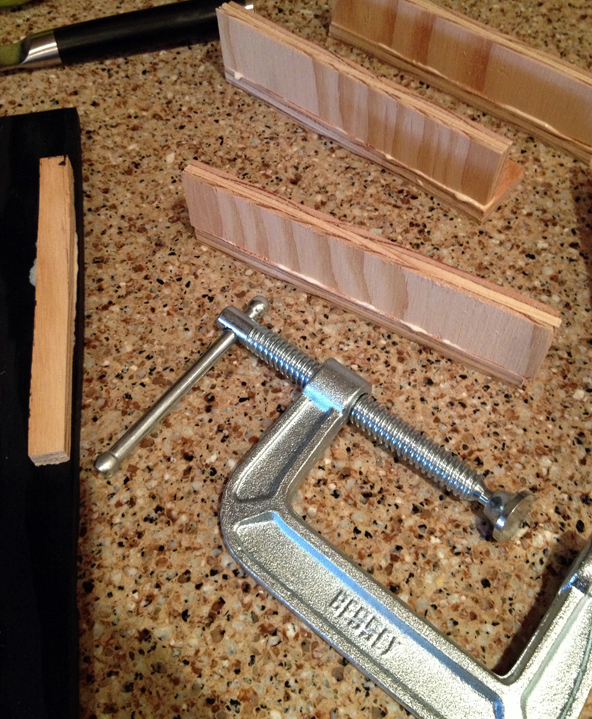 There is literally no reason for the clamp to be in this picture. I didn’t use a clamp. Ignore the clamp, is what I’m saying.
Once your L shape has dried, use more wood glue to glue it in place on the back of your large sheet of wood. Let dry.
Once all of the wood glue on the back of your frame has completely dried, try sliding in your digital frame. It should fit snugly. If it doesn’t, you’ll need to figure out what went wrong–this may involve swearing. Once it does fit snugly, cut one more piece of wood to serve as your stand. Mine’s 2.25″ wide by 5.25″ long–yours may be different. Just cut something long enough that when propped at an angle, it will be able to keep the frame upright of its own accord. Once you’ve got that piece, glue it liberally into place and let it dry.

If you haven’t painted or stained the back and all of the various bits of wood, now is the time to do so. Let dry completely. If you used stain, you may want to lightly sand any drips or spots that you may have gotten on the front of the wood, as otherwise, it can show through your paper.
Once it’s fully dry, you can affix your “daily prophet” to the front. Either use the one you printed off as a template if it’s not damaged, or print a fresh one. I used double sided tape to attach mine to prevent any ink bleeding from getting the paper damp, but you can use whatever you like. I didn’t want to mod podge the front to seal it, again, as I was concerned about bleeding ink and also because I wanted it to have the matte look of a newspaper. If you’d prefer yours to be sealed or shiny, by all means, go for it.
After your frame is done, all that’s left to do is to follow the instructions on photojojo to make your moving picture, and you’re done! Tell your friends, or let them think they’re going crazy when they think they see a picture wink at them the next time they’re over at your place. Either way, have fun and enjoy having just a bit more magic in your everyday life!

I’m confused, this one says “wizard” and the one up top says “wizards”. Good catch! I made one for myself as well, the one above is the one I mailed out on the exchange. And he LOVED it.